Help · Getting started
AI and Editor modes
The studio has two ways of working. In AI mode you design by talking to the AI and the screen stays clear. In the Editor you build by hand with panels and tools. Your project is the same in both: you can switch at any time.
Switch between modes
Use the switch AI | Editor in the middle of the header. On a phone it is in the ☰ menu under Mode. The studio remembers your choice in this browser; the first time, it opens in AI mode.
The first time you switch to a mode yourself, a short line at the bottom of the scene says what it is for. In AI mode, after the first answer of the AI or when you click a part, a tip under the switch offers Switch to Editor for people who prefer to build by hand. It shows once.
On a phone the studio always opens in AI mode, whatever you chose before. You can switch to the Editor from ☰ → Mode until the next time you open the studio.
AI mode
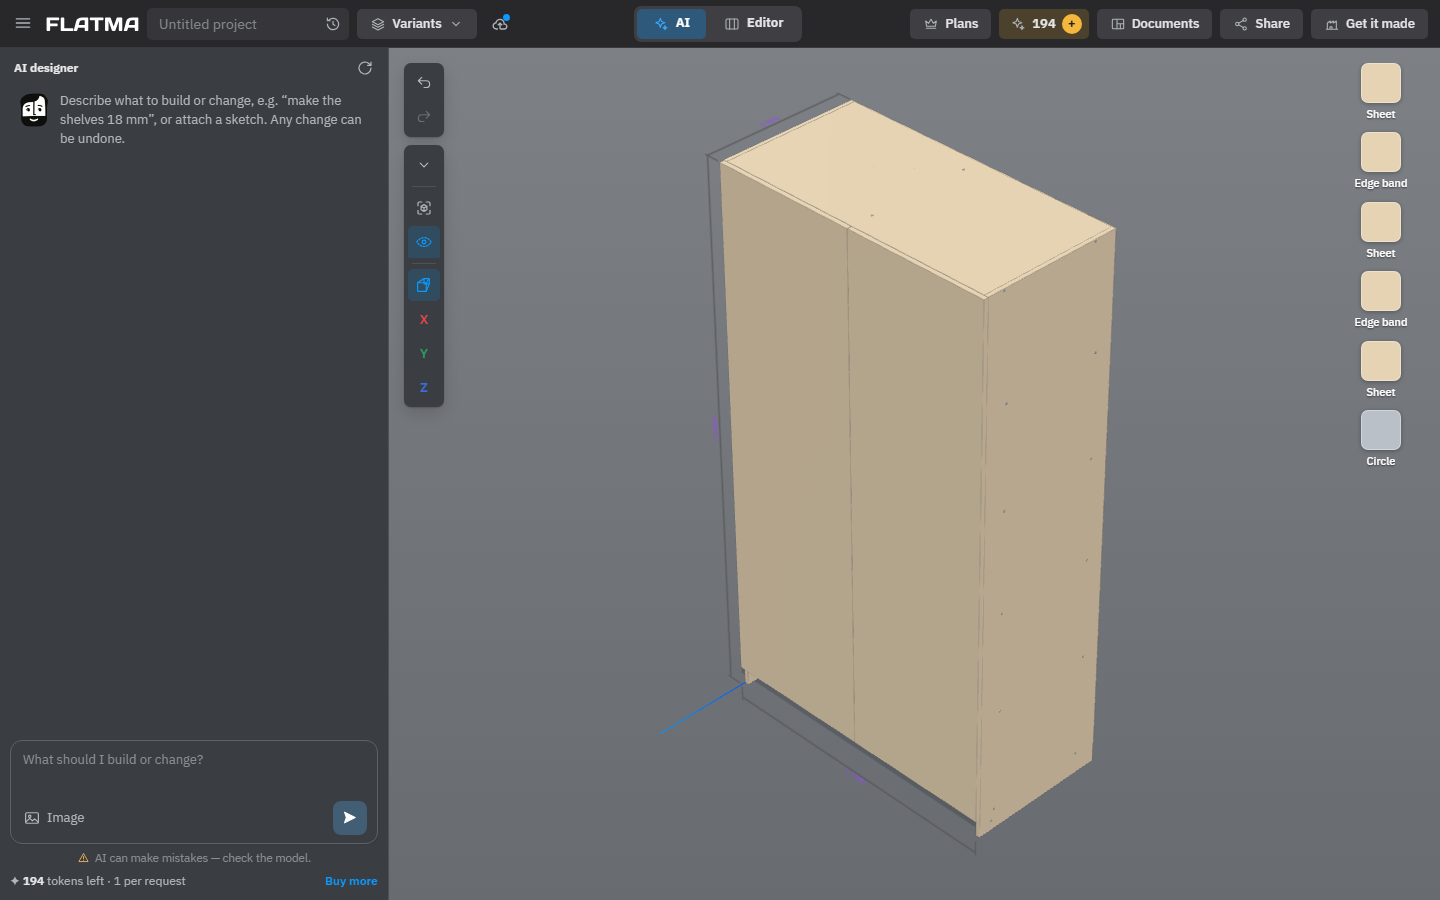
The chat takes a column on the left, the full height of the window. On a phone it is a window over the scene that folds into a button. There are no panels with parts and properties. On the scene you still have:
- Undo and Redo at the top left, with the view buttons under them, including Show the whole model.
- See-through near the camera, switched on: as you zoom towards a cabinet, its doors turn into outlines and you can click a shelf inside.
- The button to hide the room walls, when there is a room.
- Material cards on the right: click one to change that material.
You can still work by hand: drag parts to move them, click a size number to type a new size, stretch a part by its corner spheres, turn it with the arrows next to it, and right-click a part for its menu. What the AI created or changed in its last answer is outlined on the scene. See Designing with the AI.
Editor
The Editor shows both panels: Library and Elements on the left, Properties and Materials on the right, the scene toolbar and the full set of view buttons. The AI chat stays at the bottom of the Library tab, so you can still ask it to do things. See The studio at a glance.
By default the Editor is kept simple: the parts, their sizes, materials, edge banding and fasteners. Two settings show more.
Additional settings
At the end of Properties of a selected object, the link Additional settings opens four more blocks: Position, Rotation, Offsets and Animation. Click Hide additional settings to fold them away again. The browser remembers the choice. With Advanced tools on, these blocks are always shown and the link is gone.
Advanced tools
Turn them on in ☰ → Advanced tools → On. They add to the Editor:
- the workshop tools on the scene toolbar: Saw, Drill, Mill, Jigsaw, Lathe, Bend and Press, and the Operations list of a part;
- variables and formulas in fields, Repeat and ID & condition;
- merging and subtracting shapes, connectors;
- making your own parts (New part, Edit part) and sections in Project parts.
Advanced tools work only in the Editor. If you turn them on in AI mode, the studio switches to the Editor.
Hiding a tool hides only its buttons. Holes, cuts, formulas and repeats already in the project keep working in any mode and in all documents.
When there is no choice
- A project opened by a view-only link has no modes: the panels are hidden, and you can look at the model and measure it. See Sharing and remarks.
- On a company’s website, when the company’s AI is not available, there is no AI mode, only the Editor.
See also: The studio at a glance, Designing with the AI, How operations work, Variables and formulas.