Help · Parts and assembly
The Elements list
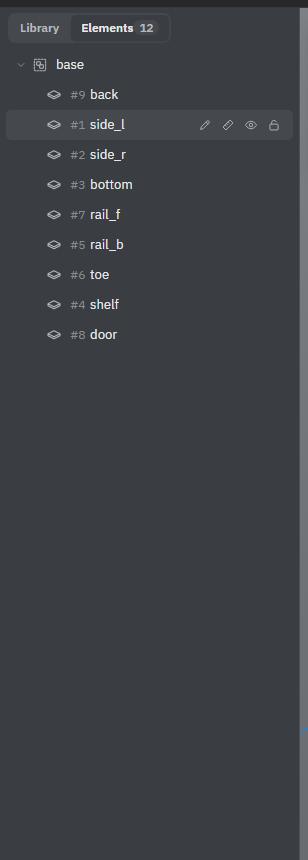
The Elements tab of the left panel lists everything on the scene as a tree of parts, groups and connectors. Use it to find and select an object, especially one hidden behind others, and to hide, lock or rename it.
Read the tree
The number on the tab is how many objects the scene has. Each row shows an icon for the kind of object, a number and a name:
- The arrow in front of a group folds it or opens it.
- The number is the part's number on the drawings, cutting maps and specification. Identical parts share a number.
- A bought or display tag marks objects that go into the documents as a bought item or not at all (see Made, bought or display only).
- A pale row is not in the model right now because its condition is off (see ID and condition).
Point at a row and the object lights up on the scene.
Select from the list
Click a row to select that object. If it sits inside a group, the group opens and the object is selected in it. Shift+click adds rows to the selection or removes them; they must be in the same group.
Move objects in the tree
Drag a row with the mouse to put the object somewhere else in the tree:
- onto the top half of a row — before it;
- onto the bottom half — after it;
- onto the middle of a group's row — into that group;
- onto the empty space below the list — out to the top level.
The object stays where it is on the scene; only its place in the tree changes. Ctrl+Z undoes the move.
Rename, dimensions, hide, lock
Point at a row to see its buttons. The ones that are switched on stay visible all the time. The same buttons are at the top of Properties for the selected object, with Duplicate (Ctrl+D) and Delete (Delete) next to them. A button on a group acts on everything inside it.
- Rename (pencil) opens the object's window: Name, Type and In documents. For a sheet, Type is Carcass, Front or Back panel; a front is a door or drawer front and is always edge banded. Your own names need a paid plan: on the Free plan the Name field is read-only, but names that are already there stay (see Plans).
- Counted in the dimensions on the scene (ruler). Switch it off and the object is left out of the dimensions drawn on the scene and the Overall size. Use it for a lamp or a plant next to the furniture.
- Hide (eye). A hidden object isn't drawn, casts no shadow and can't be clicked on the scene. It stays selected, so you can show it again from Properties.
- Lock. A locked object can't be moved, stretched, turned or changed until you unlock it.
What hiding does
A hidden part is left out of the project as if it weren't there: it isn't in the cutting maps, drawings, parts list, part labels, CNC files, 3D models, price or the list of materials. It doesn't close the edges of its neighbours, so they get banded, and nothing is fastened to it, so its neighbours have no holes for it.
While it is hidden, the part doesn't change. Stretch the cabinet, change a variable or move the parts around it — it stays exactly as it was, with its size, place and holes. When you show it again, it follows the project once more: its formulas are worked out again and the fasteners join it to its neighbours.
To keep a part on the scene but out of the documents, set In documents to Display only instead. To have a part only in some versions of the design, give it a condition (see ID and condition).
The right-click menu
Right-click a part on the scene, without moving the mouse, to select it and open a short menu: Rename…, Duplicate, Material… (opens the window of its material), Hide or Show, Lock or Unlock, and Delete. Right-click and drag still pans the view. The menu doesn't open while a tool, the ruler or Select several is on.
A copy made with Duplicate lands next to the original with a 50 mm gap, in a free spot of the same group.
See also: Groups, Sheets, profiles and shapes, The studio at a glance, ID and condition.