Help · Workshop tools
Mill
The mill works one side of a part at a time. Everything milled on that side — grooves, chamfers, rounded edges, pockets, windows and holes — is on one drawing, where you add, move and change it. It works on any part: a panel, a bar, a turned or a bent part. The outline of a panel is cut with the jigsaw, not the mill.
Open a side
- Turn on ☰ → Advanced tools and select a part or a group.
- Press Mill on the toolbar at the top left of the scene. The side under the pointer lights up.
- Click the side to mill. Esc or a click away from the part cancels.
On a curved surface, such as a turned leg, the nearest flat side of the part’s box lights up. With a group selected, new elements go into every part in the cutter’s way. To change a side later, click it again with Mill, or click one of its rows in the Operations block.
The window
The window opens full screen in three columns:
- Left — the elements on this side, one row each, marked new or edited until you apply; a dot means a warning or an error. Below them is Add element.
- Middle — the drawing of the side seen from outside: 0,0 is its lower-left corner, → is X and ↑ is Y. Ready shapes are above it, the legend below.
- Right — the settings of the selected element: Size & position, Cutter, Depth, Colour and Repeat, with Duplicate and Delete at the top.
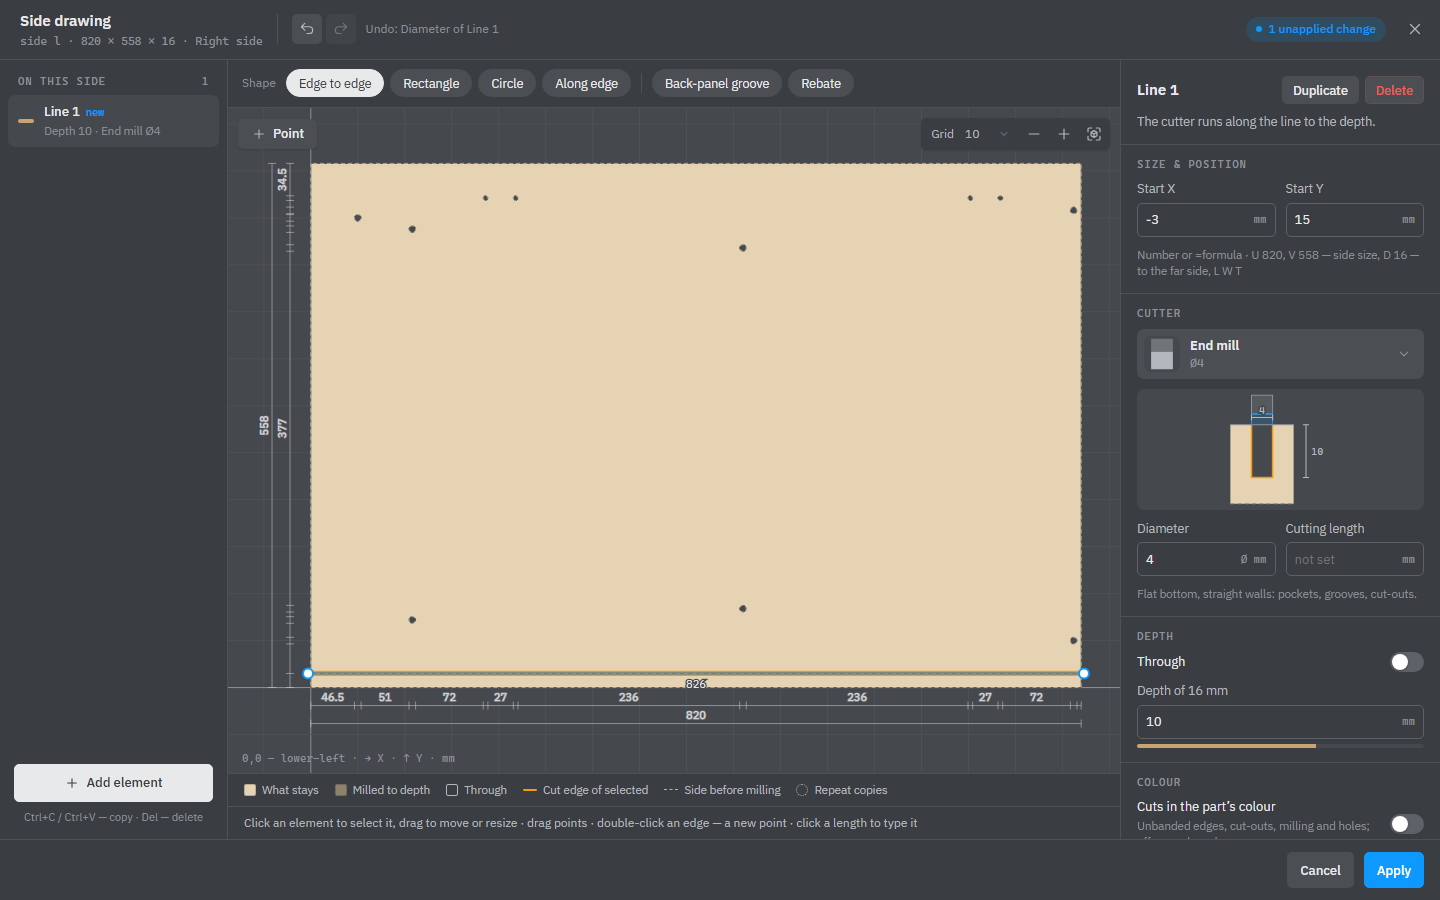
Click a line or the inside of an element to select it, and drag to move it. Drag its points to change the shape; Point or a double-click on an edge adds one. Points stick to other points and to the Grid; hold Alt to place them freely. Del deletes the selected element or point; Ctrl+C, Ctrl+V or Duplicate make a copy.
Lines and pockets
Each element is a Line or a Pocket.
- Line — the cutter runs along the line to the depth: a groove, a chamfer with a V-bit, a round-over, or a cut right through. Ready shapes: Edge to edge (a straight line right across the side, which stays so when the part stretches), Rectangle, Circle, Along edge (the side’s whole outline), and two grooves along the lower edge: Back-panel groove (4 mm wide, 10 deep, 15 from the edge) and Rebate (10 × 10).
- Pocket — everything inside the outline is cleared to the depth: a recess, or with Through a window right through. Outlines added with + under Islands stay standing. A circle as wide as the cutter is a hole: the cutter plunges like a drill.
Choose the cutter
In the Cutter section, click the cutter card to see them all, in four groups: Clearing, Grooves & carving, Joints and Edge profiles. A pocket takes only the clearing cutters; a line takes any.
| Cutter | What it is for |
|---|---|
| End mill | Flat bottom, straight walls: pockets, grooves, cut-outs. |
| Ball nose | Round bottom: soft grooves, flutes, 3D carving. |
| Bull nose | Flat bottom with rounded corners: pockets with a fillet at the walls. |
| V-bit | Pointed: V-grooves, chamfers, lettering. A flat tip makes it an engraving bit. |
| Tapered ball nose | A small ball on a taper: fine 3D carving and relief. |
| Dovetail | Wider at the bottom: sliding dovetail grooves. Run it from edge to edge — it can’t plunge. |
| T-slot | A disc under a thin neck: keyhole and T-slots. It plunges at the start, which makes the key hole. |
| Round-over | Rounds an edge: run it along the edge of a side. |
| Cove | A concave quarter-round in an edge. |
| Roman ogee | A classic S-shaped edge: a cove below, a round above. |
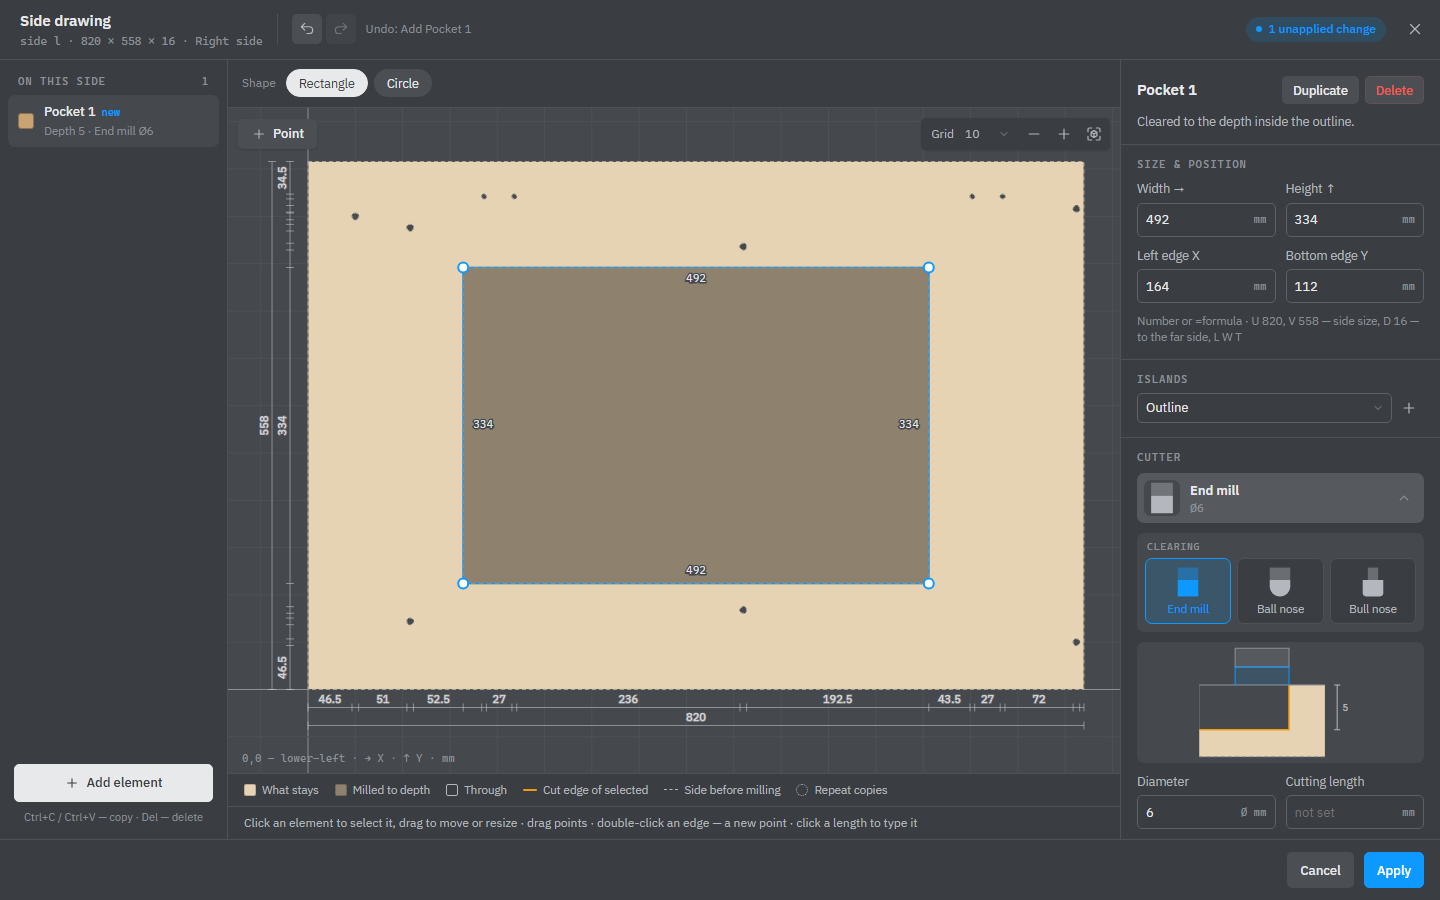
Under the card are the cutter’s own fields, with common sizes to pick from, and a section of the cutter in the part. Edge-profile cutters and the dovetail set the depth themselves from their size.
Depth and cuts right through
Type the depth in Depth; the bar under it compares it with the thickness of the part. Through cuts right through, and so does any depth equal to or greater than the thickness. A line through the part cuts it: the pieces become separate parts — delete the ones you don’t need.
On a sheet, Colour → Cuts in the part’s colour shows milling, cut-outs, holes and unbanded edges in the part’s colour instead of raw board — the same switch as in the Edge banding block.
Repeat and stretching
Repeat copies the element in the directions of the drawing: Line (count and step along → or ↑; Mirror to the other side adds the same row at the opposite edge), Circle or Mirror. Count and step take a formula of the part’s L, W, T: =floor((L-74)/32)+1. When the part is stretched chooses whether the element keeps its distance to an edge, stays in the middle or stretches with the part.
Formulas in points
Position and point fields take a number or a formula. U and V are the size of the side along → and ↑, D is the distance to the far side, and L, W, T are the part’s sizes: =U-40 keeps a point 40 mm from the right edge. With formulas the outline is live: it is worked out again whenever the part is resized. Cutter and depth fields keep only the number a formula gives.
Legend, checks and Apply
In the legend, What stays is in the part’s colour, Milled to depth is darker and the Cut edge of selected is orange.
The line at the bottom of the window sums up the checks of all elements, as a machinist would make them; click it to go to the element. Errors block Apply: a cutter wider than its window, an island outside its pocket, an outline that crosses itself. Warnings don’t: corners the cutter can’t reach, less than 1 mm left before breaking through, a thin wall.
Undo and redo in the title line (Ctrl+Z, Ctrl+Shift+Z) step through your changes in the window. Apply puts everything on the part as one step of the model’s history. Cancel drops the changes; closing with × or Esc asks first if anything is unapplied.
See also: How operations work, Jigsaw and bar section, Repeat, Drawings.