Help · Parts and assembly
Floor and room
A floor or a room around the model shows how the furniture will stand: against which wall, under which window, how much space is left. The room is only a backdrop: it isn't in the documents or the exported files.
Add a floor or a room
In the Library tab, the Scene block at the top has a list:
- None — the model alone.
- Floor — a floor under the model.
- Room — floor, walls and ceiling. A new room is 4 × 4 m and 2700 mm high.
When you choose a floor or a room, its plan window opens. Later, open it with the button next to the list, Plan: shape, doors and windows. The eye button next to it, Hide walls, hides the walls, the doors, the windows and the ceiling so you can work on the model; the floor stays. For a floor alone it reads Hide floor. Hiding is only for the view and isn't saved. In AI mode this button is on the scene toolbar.
Draw the plan
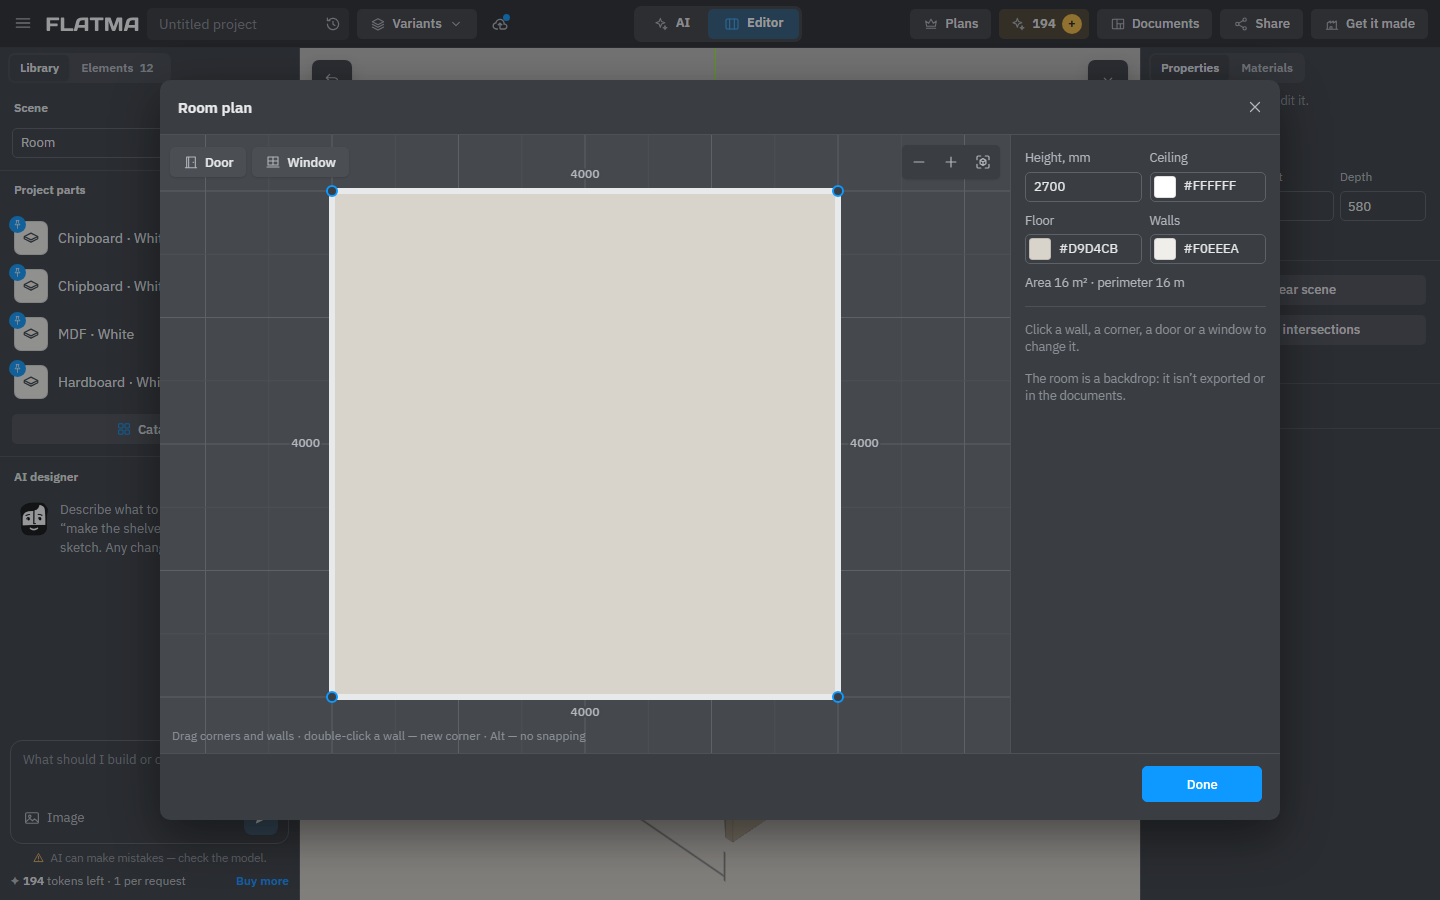
The Room plan window (Floor plan for a floor) shows the room from above. The room can have any shape:
- Drag a corner to move it, or drag a wall to move it parallel to itself.
- Double-click a wall to add a corner on it. Select a corner and press Delete to remove it.
- Corners snap to the grid and to the lines of the neighbouring corners, so right angles stay right. Hold Alt for no snapping. Walls can't cross each other.
- Use the zoom buttons, or Fit the room to see it whole.
Click a wall, a corner, a door or a window to change it on the right. A wall has its Length and Add a corner in the middle; changing the length moves the wall's end and the next wall with it. A corner has its X and Z and Delete corner. Below the colours you see the room's area and perimeter.
Doors and windows
To add one, click a wall, then click Door or Window above the plan. With no wall selected, it goes on the longest wall. Drag it along the wall or onto another wall. For the selected one you can set:
- a door — Width, Height, From left corner, Hinges (Left or Right) and its Color;
- a window — Width, Height, Above floor, From left corner and Color of all windows.
Left and right are as seen from inside the room. Delete door or Delete window removes it. When you move a wall, its doors and windows move with it. Doors and windows belong to the room: you can't select them on the scene, only change them here.
Height and colours
At the top right of the window are the room's Height and the colours of the Ceiling, Floor and Walls. A floor alone has only its colour.
Apply or cancel
Your changes show on the scene when you click Done, as one step you can undo. While the window is open, Ctrl+Z and Ctrl+Shift+Z undo and redo changes to the plan. Closing the window with × or Esc asks before it drops your changes.
Working in the room
The walls and the floor act like magnets. A part you drag sticks to the floor and to a wall it stands in front of. Pull harder and it goes through. A row dragged from Project parts lands on the floor or the wall under the pointer. The ruler and M (move by points) snap to the floor, walls, ceiling and their corners.
From outside, the walls nearest to you are cut away so you can see in, and the ceiling shows only from inside.
The room's back-left corner always sits at the origin of the scene, and Position fields measure from it. Your model never moves when you change the room. So if you drag the left or back wall outward, the model keeps its distance to that wall, and the room grows on the other side. To leave more space to the left of the model, move the model instead.
A project from Flatma community that has a room brings it along when you insert it into a project without a room. It never replaces a room you already have.
See also: Library and catalog, Size, position and rotation, Camera and views.