Help · Workshop tools
Saw
The saw cuts a part along a plane: in two pieces, part-way as a groove, or as a slot in the middle. The red band you see is the kerf — the material the blade turns into sawdust.
Mark and make a cut
- Turn on ☰ → Advanced tools and press Saw on the toolbar at the top left of the scene. The saw window takes the place of Properties in the right panel.
- Move the pointer over the part: the saw follows it. Click the part to mark the cut.
- Drag the handles or type the numbers, and check the result line: it shows the two pieces you will get.
- Press Cut or Enter.
A cut right through a part splits it: each piece becomes a part of its own. The saw stays on for the next cut. Cancel or Esc closes it without cutting.
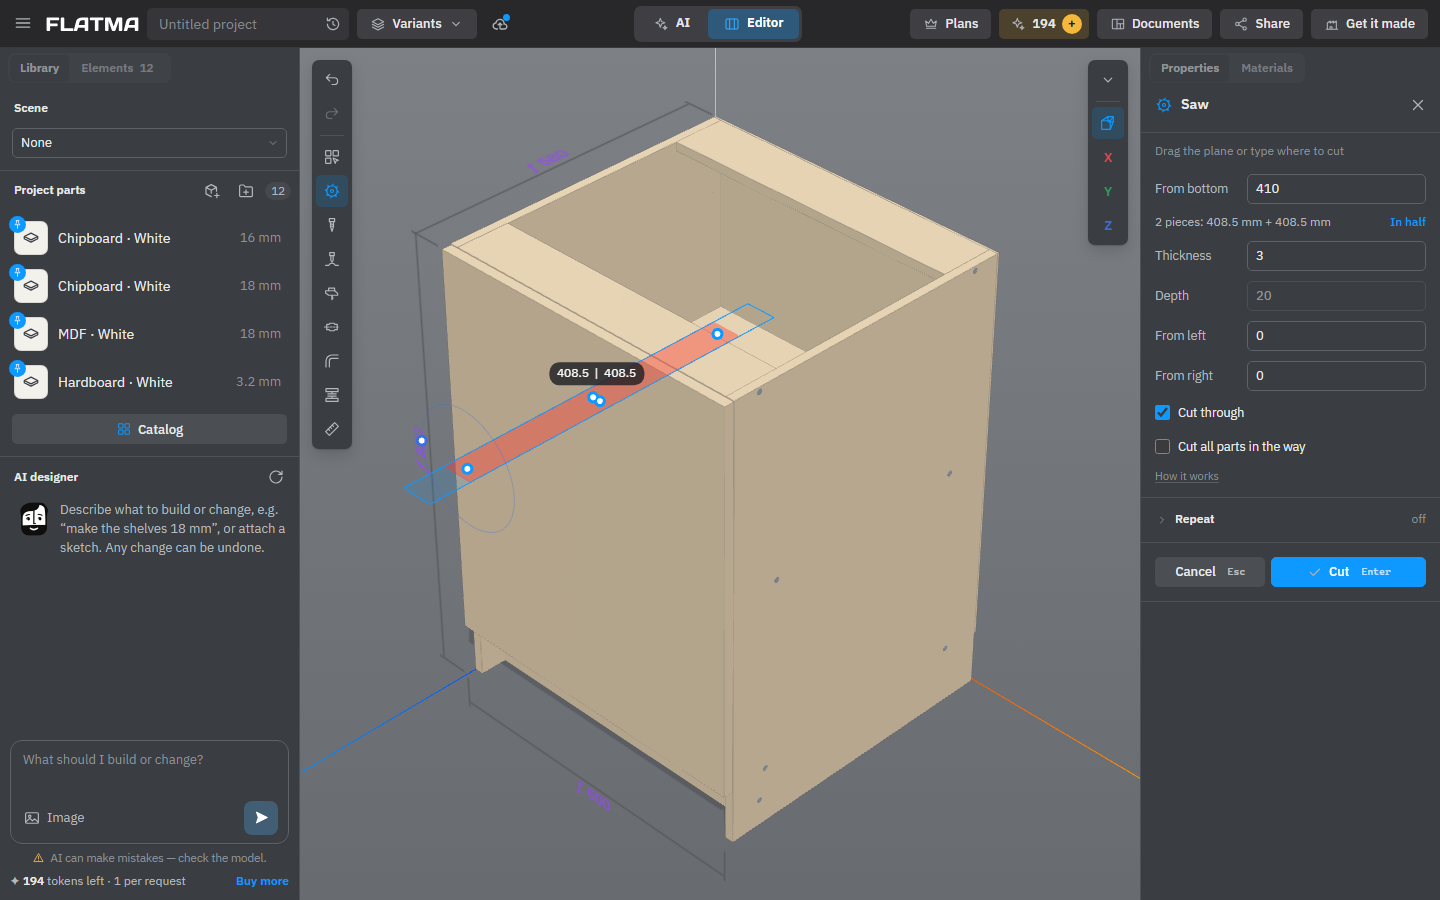
Move, turn and set the depth by dragging
- Move: drag the plane or its top point.
- Turn: drag the point on the ring. The cut turns around the axis you are looking along: look from above to cut across at an angle, look from the front or the side to tilt the cut or start it from below. It snaps to every 15°.
- Depth: drag the bottom point. It snaps to half the thickness; past the far side the cut goes through.
The handles move in the plane that faces the camera most. While you drag, the cut snaps to corners and centres of other parts, centres of groups and ends of pinned rulers.
The fields
- From left (or From right, From top… — named after the side it counts from): from that end of the part to the middle of the blade. In half puts the cut in the middle of the part.
- Thickness — the thickness of the blade, which is the width of the kerf. It starts at 3 mm.
- Depth — how deep the cut goes, from the face where the blade enters. It is off while Cut through is on.
- Cut through — the cut goes right through the part.
- Cut all parts in the way — every part the blade passes through gets the cut, not only the one you clicked, like a stack of boards cut in one go.
Stop a cut short of the edge, cut a slot
The two points at the ends of the cut set its length. Drag one inward and the cut stops that far from the edge. The two end fields, named after the sides (such as From front and From back), show these distances; 0 means the cut runs out over the edge.
With both ends inside the part, the saw cuts a slot in the middle: a groove, or with Cut through a slot right through. The ends snap to the edge and to the same distance as the other end, so a slot is easy to centre.
Formulas
Thickness, Depth and the distance to the edge take a formula as well as a number: =T/2 cuts half the thickness deep, =L-37 puts the cut 37 mm from the far end. The formula is kept and worked out again when the part is stretched. Moving the saw by its points replaces it with a number.
A formula works only along the part’s own axis. For a tilted cut, or a part that is turned, type a number.
Change or remove a cut
Click the cut in the Operations block of Properties. The saw opens as Edit cut, with the cut where it was; move it, change the fields and press Apply. The bin next to the row removes the cut. A cut that split the part into pieces can’t be changed or removed while the other pieces exist.
A row of equal cuts is one cut with a repeat, set in the folded Repeat section of the saw window, together with how the cut behaves when the part is stretched. The settings stay while the saw is on and reset when you turn it off. See Repeat inside a tool window.
The saw cuts only your own parts: not locked parts and not copies of a project part. To cut a project part, change the part itself.
See also: How operations work, Drill, Repeat, Cutting maps.