Help · Parts and assembly
Size, position and rotation
You can change sizes in three ways: type them in Properties, click a dimension on the scene and type, or pull a corner of the part. Position and rotation work the same way, by numbers or by hand.
All lengths are shown in your units. To switch between millimetres and inches, open ☰ → Units and pick mm or in. Inches are shown as fractions down to 1/16, and you can type them the same way: 23 5/8. A number with a unit, such as 600mm or 60 cm, is read in that unit whatever you chose.
Overall size of the model
When nothing is selected, Properties shows Overall size: the Width, Height and Depth of everything on the scene, the same numbers as the outer dimensions drawn around the model. Inside an open group the block is called Group size and shows that group.
To resize the whole model, type a new number and press Enter. Everything stretches to it by the same rules as a group: sheet thicknesses, locked sizes and offsets keep their length, and the free space shares the difference (see Groups). If a variable sets that size, the field takes you to the variable instead.
Clear scene, below the size, removes everything after asking. You can undo it with Ctrl+Z.
Size of a part or group
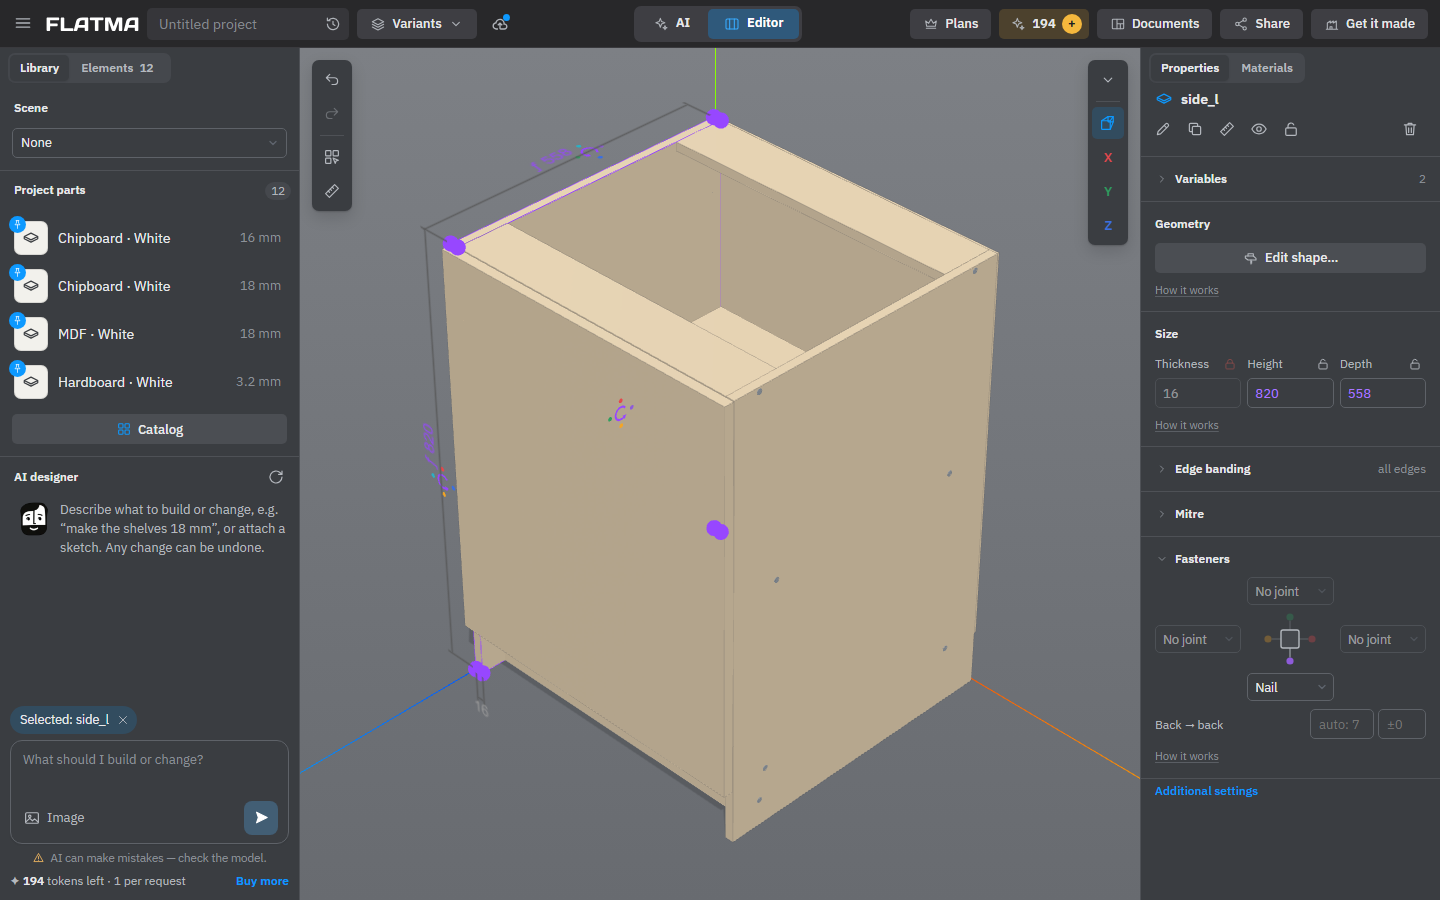
Select an object. The Size block shows its Width, Height and Depth along the scene's axes: X to the right, Y up, Z towards you. Type a number and press Enter, and the object stretches to it. What stretches inside a group is decided by the rules in Groups. Nothing gets smaller than 1 mm.
Some sizes belong to the material. A sheet's thickness and a profile's section don't stretch: change them in the Materials tab. A sheet or profile also can't grow past the board or bar it is cut from; a line under the fields says what limits it.
Size locks
Above each field is a small lock. A locked width, height or depth keeps its size when the group around the object stretches; the rest of the group stretches instead. Use it for a plinth that must stay 100 mm high. A greyed-out field or number tells you why when you click it: the object is locked, its size is locked, it belongs to the material, or a formula sets it.
Dimensions on the scene
The selected object shows its dimensions on the scene. A group, or several objects, also shows a chain of inner sizes between the parts. Every number can be clicked:
- An ordinary number opens a small Size window. Type the new value and press Enter.
- A number in the chain sets that inner size, even a gap between parts. The next size along that can change takes the difference, so the overall size stays; if there is none, the overall size grows.
- A gap held by an offset, such as the gap around a door, is grey but can be clicked: the window then sets the offset (see Offsets).
- A purple number with ƒ is set by a variable; clicking it takes you to that variable.
- Any other grey number can't be changed; clicking it shows a line at the bottom of the scene saying why and what to press.
Stretch by hand
The selected object has spheres at its corners. Drag a sphere to stretch the object; it snaps to the faces of the parts you can see. Hold Alt (⌥) for no snapping.
To put a corner on an exact point, click a sphere without dragging, then click the point. The object stretches so that corner lands there; the opposite corner stays. On the way, press Alt to move the whole object by that corner instead of stretching it, or type a distance and press Enter. Esc cancels.
Position
The Position block sits behind Additional settings at the end of Properties (always visible with Advanced tools on). X, Y and Z give the lower-left-back corner of the object:
- inside a group — from the group's own lower-left-back corner;
- with a floor or room — from the room's back-left corner;
- otherwise — from the scene's origin.
While you edit a field, the scene marks the object's corner and the point it is measured from. Type a number to put it there, or add to the one shown: if the field says 318, 318+50 moves the object 50 mm further.
You can also move by dragging. The object slides along the floor, a wall or the plane you look at, and snaps to other parts. Hold Shift to keep to one axis, Alt for no snapping, and press Esc to put it back.
To move exactly from one point to another, press M. Click a base point — a corner, the middle of an edge, an edge or a face — then click where it should go. Shift keeps to one axis, X, Y or Z locks an axis, and a typed distance with Enter moves exactly that far. Esc cancels, a second Esc leaves the tool.
With Advanced tools on, a position can follow a formula: =side_l.right keeps the object against the right face of the part with the ID side_l. See Variables and formulas.
Rotation
The quickest way to turn an object is with the three arrows around it on the scene: each click turns it 90° around that axis. Around a part, coloured dots show which of its sides now faces each way.
For other angles, open the Rotation block behind Additional settings. It has the angle around X, Y and Z in degrees, relative to the group the object is in. A new angle turns the object around its centre, so it stays in place. A locked object doesn't turn.
Measure
To measure a distance, click Measure (the ruler) on the scene toolbar, then click two points. Points snap to corners, the middles of edges, edges, faces, the centres of parts and groups, and to the floor and walls. Shift measures along one axis; after the first point you can type a length and press Enter. Click a number to remove it. Esc cancels the one you started; press it again to leave the ruler.
Click the lock next to a number to keep that measurement on the scene; leaving the ruler and Clear remove only the others. Drag its ends to change it; parts you drag or stretch snap to them. Kept measurements don't follow parts that move, and they are gone when you reload the page.
See also: Groups, Offsets, Keyboard and mouse, Variables and formulas.