Help · Workshop tools
Drill
The drill makes round holes: through a panel, blind to a depth, tilted, or in a row. It can also put a fastener in the hole and drill the matching hole in the part behind it.
Drill a hole
- Turn on ☰ → Advanced tools and press Drill on the toolbar at the top left of the scene. The drill window takes the place of Properties in the right panel.
- Move the pointer over the part: the drill slides over its surface. On a flat face it stays on that face and doesn’t jump to the next one. Click to mark the hole.
- Drag the top point to move the hole, or type its distances to the edges.
- Press Drill or Enter.
A click on the face of a panel makes a through hole; a click on its end drills to a depth. Once you tick or untick Drill through yourself, it stays that way while the drill is on. Cancel or Esc closes the drill without drilling.
To tilt the hole, drag the bottom point: it sets the angle of the axis and the depth. The axis snaps to square with the face and to the main axes.
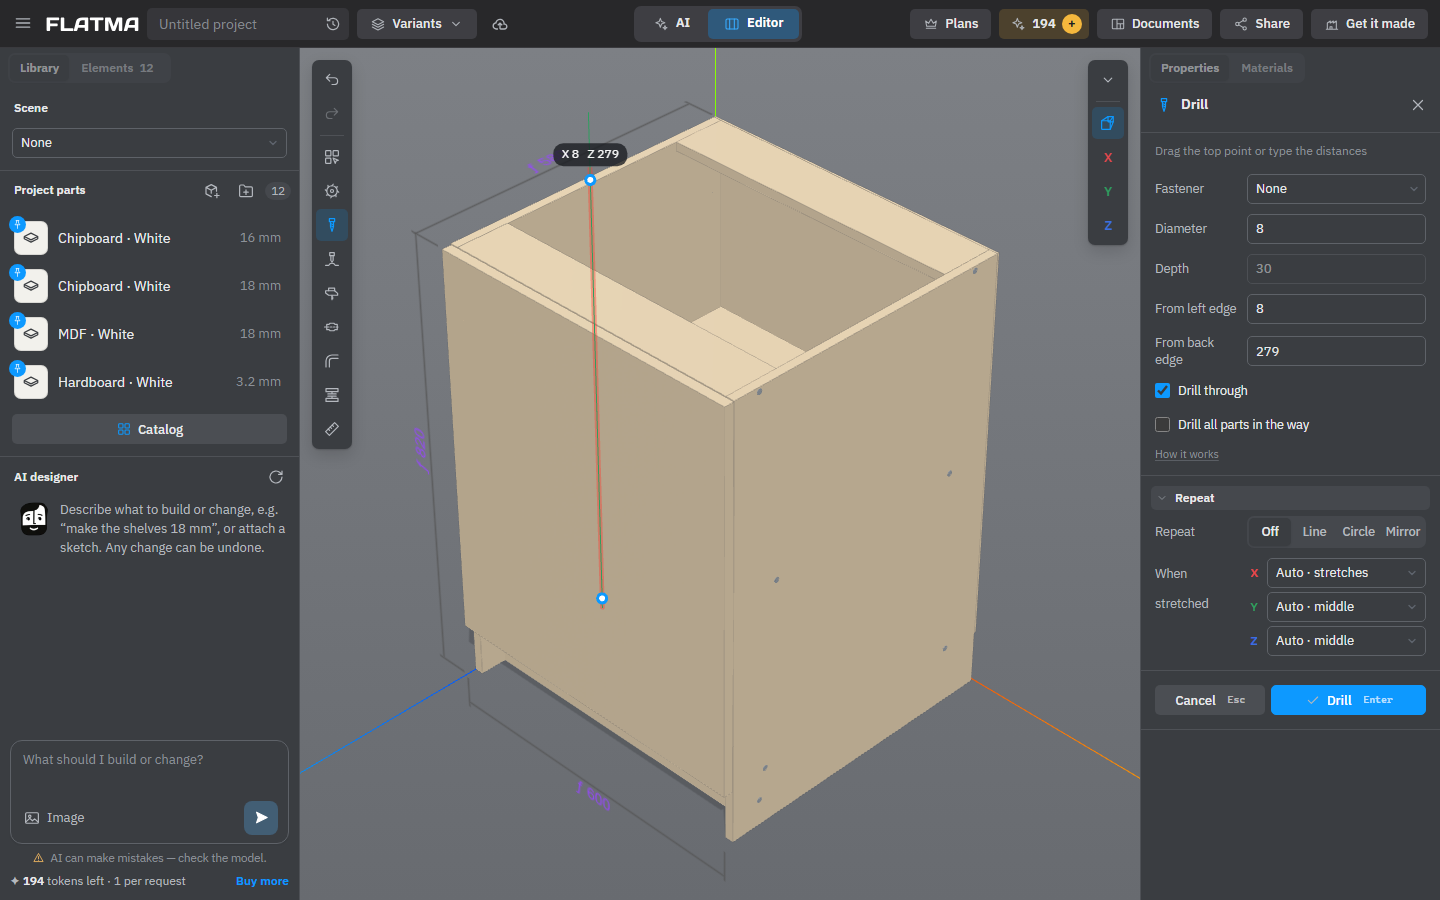
The fields
- Diameter — it starts at 8 mm.
- Depth — how deep the hole goes. It is off while Drill through is on.
- From left edge, From bottom edge, From back edge — the distances from the centre of the hole to the edges of the part. You get the two that lie on the face you drill.
- Drill through — the hole goes right through the part.
- Drill all parts in the way — the hole goes on into every part along its axis, not only the one you clicked.
Diameter, Depth and the distances take a formula too: =W/2 keeps a hole in the middle of the width, =L-37 keeps it 37 mm from the far end. The formula is kept and worked out again when the part is stretched; moving the drill by its points replaces it with a number.
A row of holes
Holes for shelf pins or hinges are one hole with a repeat. Open the folded Repeat section in the drill window and choose a line, a circle or a mirror copy; the copies show in red before you drill. The settings stay while the drill is on, so you can drill the same row in one side and then in the other. See Repeat inside a tool window.
A fastener in the hole
The Fastener field (it says None) opens the catalog of fasteners that go into a drilled hole: Screw, Metal screw, Lag screw, Nail, Confirmat, Bolt, Carriage bolt, Rivet, Threaded insert, Cross dowel and Shelf pin. Click a card to choose it; some cards also have a size list.
- The drill makes the hole that fastener needs, so the diameter, depth and through fields go away. The result line shows the hole and what goes into the part behind.
- The part right behind the hole gets its own hole for the fastener, such as a pilot hole for a screw. That hole moves with the part and goes away with it.
- An orange card won’t fit in this hole; its tip says why, and you can still choose it. A chosen fastener that can’t be installed shows red, with the reason.
- Click the chosen card again to take it off and drill a plain hole.
The fastener goes into the parts list. A shelf pin needs no part behind it: it sticks out of its own part. When you turn the drill off, the next hole starts without a fastener again.
Change or remove a hole
Click the hole in the Operations block of Properties. The drill opens as Edit hole, with the same size, place, formulas, repeat and fastener; change them and press Apply. The bin next to the row removes the hole and its fastener.
Fasteners on the sides of a sheet, such as dowels and cam locks between cabinet panels, are set in the Fasteners block, not with the drill. See Fasteners and hardware.
See also: How operations work, Fasteners and hardware, Repeat, Saw.