Corner Wardrobe: DIY Plans, Dimensions & Assembly Guide

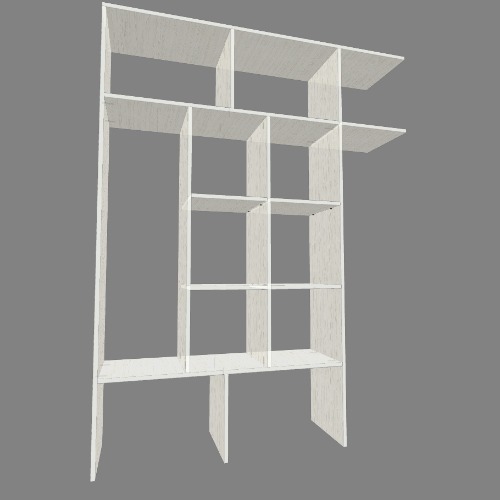
Interactive 3D model: rotate to inspect, open in designer to customize
This project is shared by the community and serves as a reference and starting point. Verify all dimensions and structural correctness before cutting
Total edge banding length - 22.42′ (73.55 m)
Total cutting length - 36.92′ (121.117 m)
| Materials | Hardware |
|---|---|
|
Laminated Particle Board 0.63″x79.72″x98.43″ (16x2025x2500 mm) ( color H1636_12) - 6 pcs. + Edge banding 1 x 19 (H1636_12) - 22.42′ (73.55 m) |
Hardware not specified |
Description by Flatma:
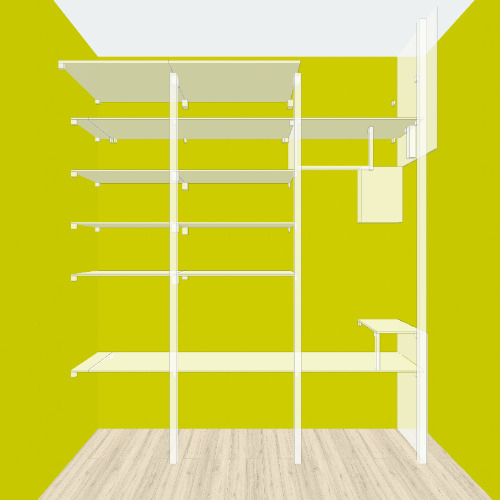
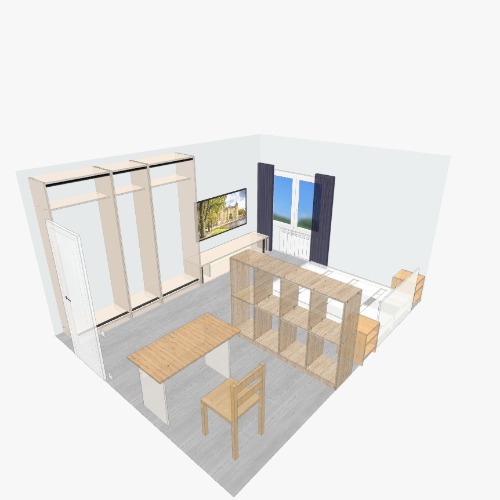
This modern minimalist corner wardrobe design maximizes storage in often-unused room corners, offering a sleek L-shaped layout that blends open and closed storage. Its clean lines and natural woodgrain finish provide design inspiration for contemporary bedrooms and walk-in closets seeking a cohesive, space-efficient storage solution. The design prioritizes accessibility with multiple shelving compartments for organized clothes, shoes, and accessory storage.
Construction Details for Wardrobe Plans with Dimensions
The L-shaped layout of this built-in closet design utilizes custom dimensions to fit a specific corner, a common approach for DIY closet plans. While standard wardrobe depths often range from 22 to 24 inches, this blueprint details a custom configuration. The design features a combination of open shelving and closed cabinet sections, creating a versatile storage system. These wardrobe plans with dimensions serve as a detailed starting point for construction, with the understanding that final measurements require verification against your specific site conditions.
Materials and Hardware
Construction relies on laminated particle board (melamine board) in a 16 mm thickness, finished in color H1636_12 with a natural woodgrain texture. The project requires six full sheets cut to a 2025x2500 mm format. All exposed edges receive 1 x 19 mm edge banding in a matching H1636_12 finish, with a total edge banding length of 73.55 meters. The material utilization factor for this build calculates to 70.71%.
Assembly Process
Assembling this DIY closet involves careful cutting and joining of the laminated particle board panels. The total cut length for all components measures 121.117 meters. Precise application of the 73.55 meters of edge banding ensures a polished, durable finish on all visible edges, a key step in the cabinet assembly process.
Adaptation Options
These blueprints are available for preview before downloading and act as a reference material. The dimensions may require adjustment to fit your specific room layout and ceiling height. Consider this project a foundational starting point for your custom built-in closet, not a final specification. Modifying shelf spacing or adjusting the L-shape proportions can tailor the storage to your needs.
Frequently Asked Questions
Q: How can I adapt these corner wardrobe dimensions for a smaller space?
A: You can scale down one or both legs of the L-shape. Maintain a consistent depth for hanging rods, typically between 22 and 24 inches, while reducing the width of shelving sections. The original design uses six 2025x2500 mm sheets with a 70.71% material utilization, so reducing dimensions will lower material requirements.
Q: What materials are required to build this, and how many sheets?
A: The primary material is 16 mm thick laminated particle board (melamine) in finish H1636_12. The blueprint specifies using six full-sized sheets, each measuring 2025 by 2500 millimeters. You will also need 73.55 meters of matching 1 x 19 mm edge banding.
Q: How complex is the assembly process for a DIYer?
A: The assembly involves managing a significant amount of panel cutting, with a total cut length of over 121 meters, and applying 73.55 meters of edge banding. Experience with cabinet assembly techniques for joining laminated boards is beneficial for achieving a professional result.
Q: How do I download and use these wardrobe blueprints?
A: Blueprints are available for preview to review the L-shaped layout and dimensions. After downloading, use them as a reference guide. Verify all measurements against your installation space, as the project serves as a starting point and dimensions may need adjustment for your specific conditions.